Same-Day CEREC Crown Process (Step-By-Step Guide)
If you need a dental crown, you may wonder if there’s a way to get one without waiting for weeks or even months.
If that’s the case, you’ll be happy to know that there is a solution: same-day CEREC crowns!
Over 30 million tooth restorations have been fabricated with CEREC CAD/CAM technology.
In this blog post, we’ll walk you through the step-by-step process of getting a same-day CEREC crown so you are better prepared for your appointment.
Need Dental Advice? Ask Dr. Hannan!
What Are CEREC Crowns?
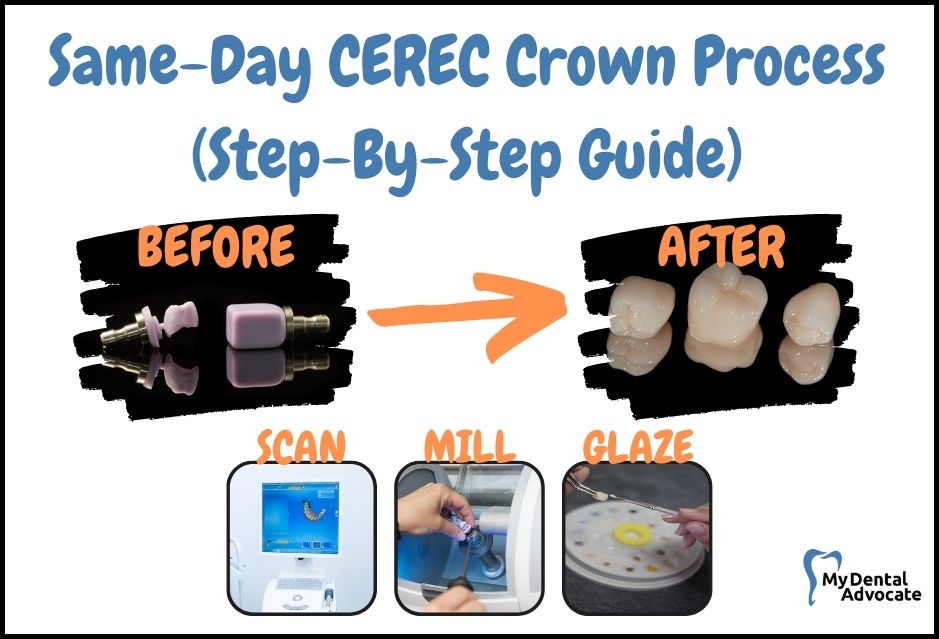
CEREC crowns are all-ceramic crowns fabricated in-office using CAD/CAM technology.
They are made from a high-strength ceramic material matched to the color of your natural teeth.
CEREC crowns are an ideal solution for repairing damaged or decayed teeth because they are esthetic, durable, and efficient to fabricate.
In addition, the dentist can use them to replace old metal fillings, improve the appearance of misshapen or discolored teeth, and protect weak teeth from further damage.
The CEREC crown process takes two hours from start to finish and doesn’t require a gooey impression, temporary crown, or future delivery appointment. Everything is completed in just one visit!
Not all dentists have CEREC CAD/CAM technology in their office, so it’s important to call around and find one that does.
In addition, your insurance coverage, dental office location, and dentist expertise will dictate the cost of a CEREC crown.
Recommended Reading: What Are CEREC Crowns? (Advantages & Disadvantages)
What to Expect?
Dental treatment can be an intimidating process, especially if you’ve had traumatic dental experiences in the past.
As a dentist, I’ve yet to meet anyone who enjoys the sights and sounds of dental treatment.
Along with undergoing the procedure, you must endure numbing shots, excessive water spray, and a costly bill.
This step-by-step guide will give insight into the CEREC same-day crown procedure from a dentist’s perspective. Understanding what’s involved in the process will help put your mind at ease and make the experience more enjoyable.
Enjoyable and dentist are two words rarely found in the same sentence but hopefully, it helps you the day of the procedure.
Diagnosis & Treatment Plan
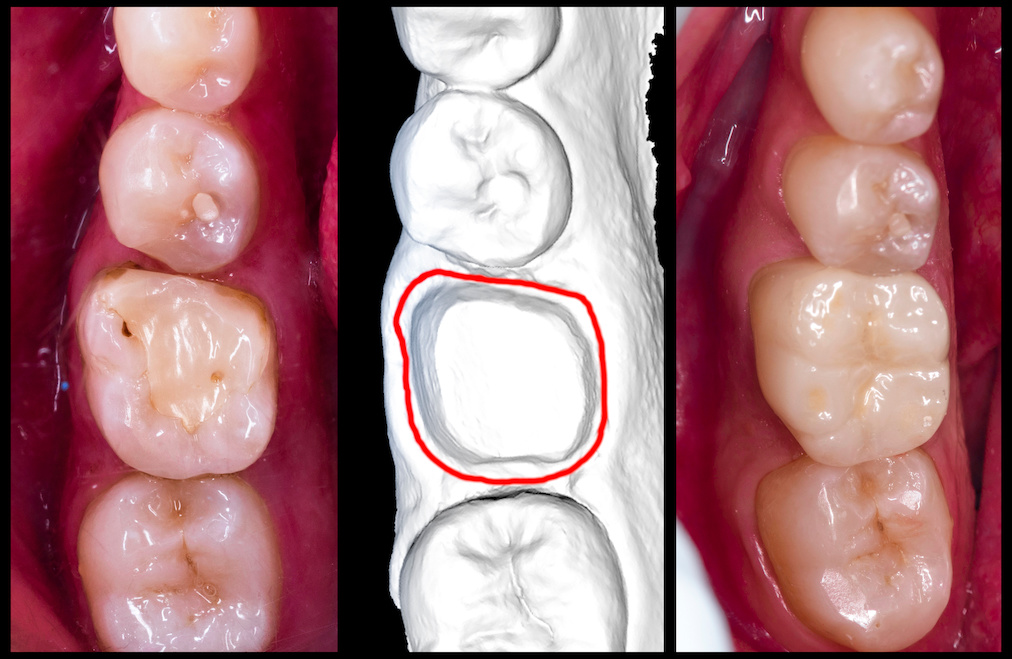
Crown diagnosis is the first step in the process. Dental crowns are necessary when you’ve had a root canal, more than half of the tooth structure is missing or has a cavity.
Other reasons for dental crowns include masking dark teeth or other esthetic purposes.
Recommended Reading: Endodontist: The Root Canal SpecialistIf your dentist informs you that you need a dental crown, make sure they can explain why it’s needed.
More importantly, have them show you the problem using an intraoral camera. Dental technology has dramatically improved communication with the patient more effectively using pictures, videos, or updated x-rays.
CEREC crowns are not the only type of crowns available. Other crown choices include zirconia, gold, and porcelain-fused-to-metal (PFM).
The type of crown recommended is based on the location of the tooth, your esthetic goals, and how much money you’re willing to spend.
Recommended Reading: When Are CEREC Crowns NOT Recommended (Top 6 Reasons)
Dental Anxiety
As you lay back in the chair, you think about all the other places you’d rather be, maybe on a beach, on your couch, or even at your grocery store. You are not alone!
Recommended Reading: Prosthodontist: Complex Cases & ConsiderationsAccording to a recent study, 80% of Americans have some anxiety regarding dental treatment, and up to 15% have intense dental anxiety.
Lack of control and fear of the unknown are two common reasons for this emotion.
During treatment, you lose all sense of control and are required to sit still as you anxiously anticipate a pain response (fear of the unknown).
As a dentist, the last thing I want to do is hurt a patient. I know what you’re thinking; that’s hard to believe, but most dentists go into the profession desiring to help people.
Dentists are humans too! With that being said, YOU have the ultimate control. How?
Inform your dentist that you will let them know if something hurts or you need to catch your breath. Then, alter your mindset so you are in the proper headspace for treatment.
Lastly, don’t be afraid to ask for nitrous oxide (laughing gas) or other means of anxiety relief. I can tell you from experience that as a dentist, I’m more comfortable if you’re comfortable.
In addition, be sure to bring headphones or ear plugs to block out the high pitch sounds and reading material to occupy yourself between the crown fabrication steps.
Recommended Reading: How Much Are CEREC Crowns? (Pros, Cons & Treatment Cost)Step 1: Anesthetic
After taking vitals, reviewing medical history, and discussing treatment numbing up the tooth with an anesthetic will be the first step.
Next, your dentist or dental team member will apply topical numbing gel (20% Benzocaine) on the tissue to minimize the poke of the needle.
If an upper tooth is being treated, the dentist can individually numb the tooth. However, the dentist will numb the lower jaw’s entire side if a lower tooth is treated.
This is because the lower jaw has thicker bone, and accessing the nerve can only be accomplished in the back of the mouth near your ear.
The upper jaw has more porous bone, and the anesthetic can be applied near the roots in a localized area.
Helpful ways to minimize pokes include having the dentist shake the tissue during the needle insertion, lifting one leg for distraction, or pinching your hand.
Don’t be alarmed if some numbing medication drips down your throat; it will not cause your throat to close up. It will take 10-20 minutes before the tooth is adequately numb.
The numbing medication will remove the pain response; however, you will still feel pressure.
Inform your dentist if the tooth is not sufficiently numb during the treatment.
Step 2: CEREC Pre-Scan
CEREC CAD/CAM technology is game-changing!
The software can analyze the adjacent teeth and opposing teeth to design a custom-fit crown that comfortably fits within your bite. CEREC pre-scan involves scanning the opposing teeth and your bite.
Most cases will require three scans. (tooth after preparation, opposing teeth, teeth together). CEREC can also image a tooth and copy its shape before tooth preparation.
Then you can fabricate a crown that looks and feels exactly like the tooth before. That’s amazing!
Step 3: Tooth Preparation
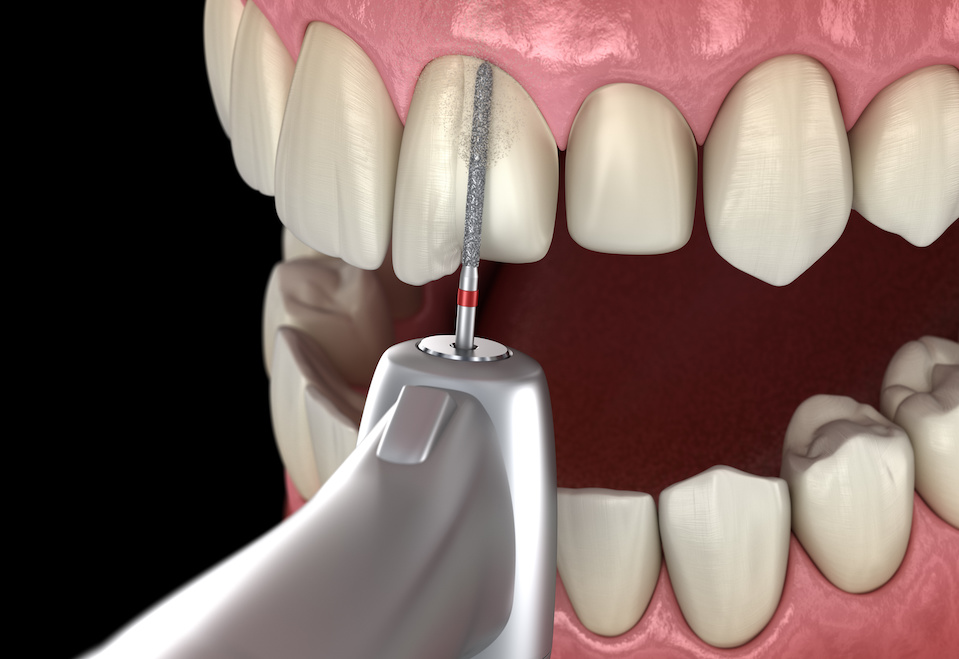
First, the dentist will begin trimming down the tooth. If there’s a large cavity, it will be removed before other tooth structure is removed to verify complete removal.
High-pitched sounds are expected when the dentist uses a high-speed handpiece.
This is because the high-speed handpiece removes large amounts of tooth structure quickly, whereas the slow-speed handpiece uses larger burs to remove tooth decay slowly.
The dentist needs to remove decay slowly near the nerve to avoid invading the nerve and requiring a root canal.
The dentist will have you close down to verify enough tooth has been removed with the opposing tooth (opposite tooth that comes together when biting).
If not enough tooth structure is removed, the CEREC crown’s ceramic material will fracture under heavy stress. The dentist will also make space around the entire tooth so the crown can fit between the teeth and you are still able to floss.
In addition, the dentist may trim the tooth below the gumline if there’s a cavity or for esthetic purposes, so you can’t see the transition between tooth and crown.
Finally, remember that the dentist may rub bitter-tasting liquid on your gums to constrict the tiny blood vessels and stop the bleeding. Once the tooth is clean and debris-free, it’s on to the next step.
Step 4: CEREC Post-Scan
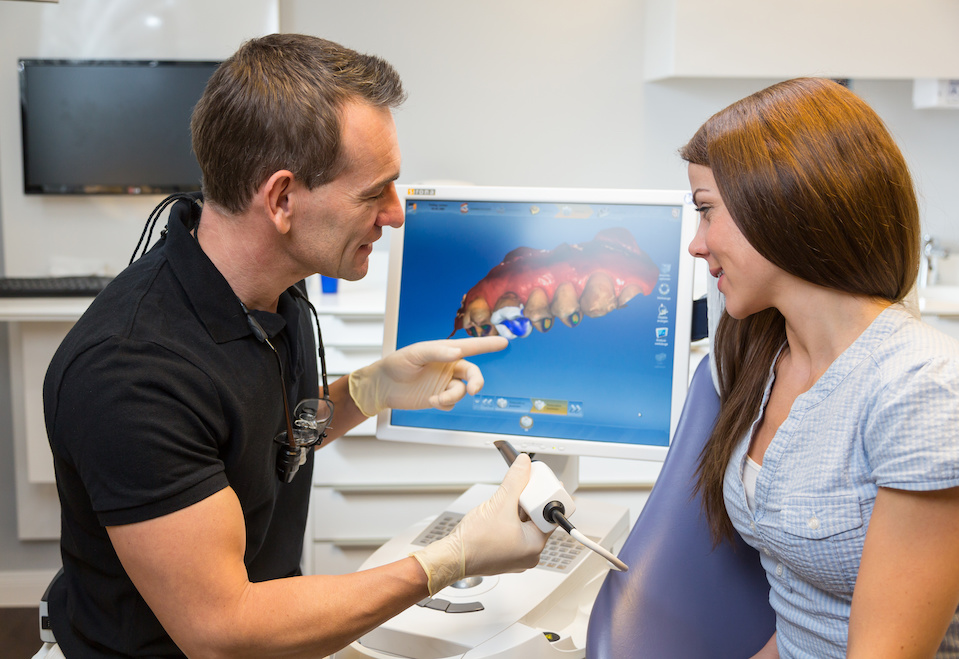
Now it’s time to image the tooth using an intraoral scanner. For an accurate scan, the tooth must be dry and free of saliva, blood, or debris.
Unlike traditional gooey impressions, it’s simple and stress-free if a scan needs to be re-done. The scanning process takes approximately 2-4 minutes.
After an accurate scan, the dentist will have you sit back and relax while the crown is designed, milled, and fired in a specialized oven.
Next, it’s on to the design phase.
Step 5: CEREC Crown Design
As a dentist, this is when the fun truly starts.
Did I mention that CEREC technology is game-changing? Of course, there is a learning curve when first starting.
However, as the dentist becomes more comfortable with the machine, it becomes second nature.
Finally, the software analyzes all aspects of the crown and provides a crown proposal.
Next, the dentist has complete control and full access to adjust any crown area.
For example, if the contact with the adjacent tooth is too light and food may get stuck, the dentist can increase the contact pressure. Or, if the crown is too bulky, the dentist can re-shape the walls, so it’s in line with the other teeth.
Once the dentist is happy with the design, they will digitally send it to the milling machine for fabrication.
Recommended Reading: Are CEREC Crowns Better Than Traditional Crowns? (Dentist’s Perspective)
Step 6: CAD/CAM Milling
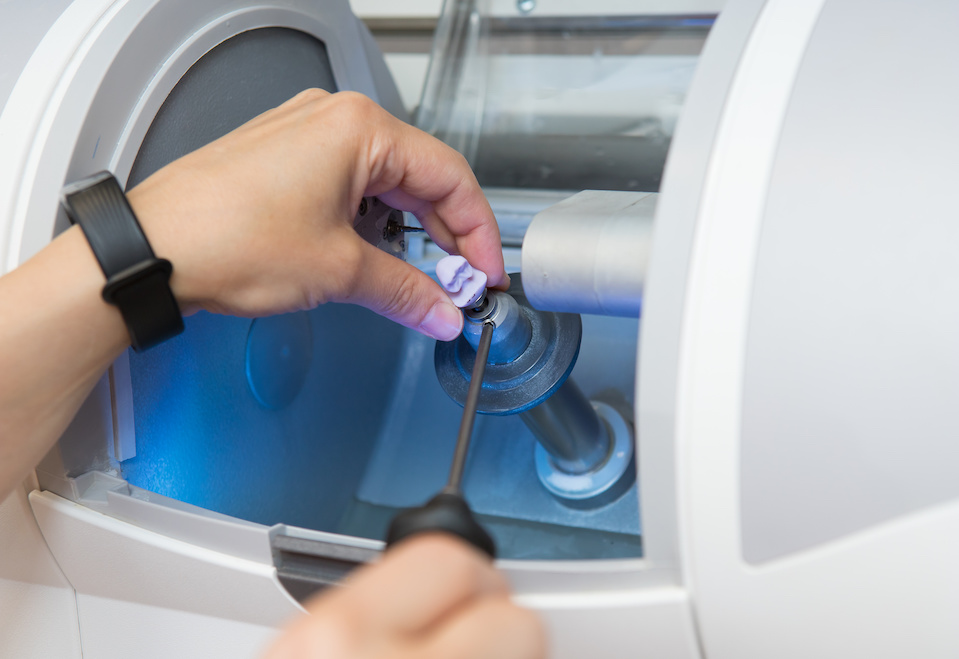
The CEREC CAD/CAM milling machine houses two diamond-coated burs that precisely trim down the crown based on the desired parameters.
Ask your dentist if you can watch this step!
First, the two motors trim down the prefabricated ceramic block, which takes six to twelve minutes, depending on the crown material.
The dentist can fabricate CEREC crowns from many types of ceramic materials.
Some are more esthetic such as feldspar ceramic, whereas others are more durable such as lithium disilicate.
After the crown is complete, it’s on to the next step, if necessary. Not all CEREC crowns require heat treatment in a specialized oven.
However, if custom-glaze is applied or a “blue-block” lithium disilicate block is used, it will require 10-20 minutes in the oven.
Step 7: CEREC Crown Firing
CEREC blocks requiring a firing stage include lithium disilicate and zirconia glass-ceramics.
The firing process consists of placing the crown in a specialized oven at 750 degrees Celcius. This process strengthens the ceramic material and bakes on any custom glaze.
Increasing the crown strength for a posterior tooth (molars) is highly recommended as they receive the highest amount of bite force.
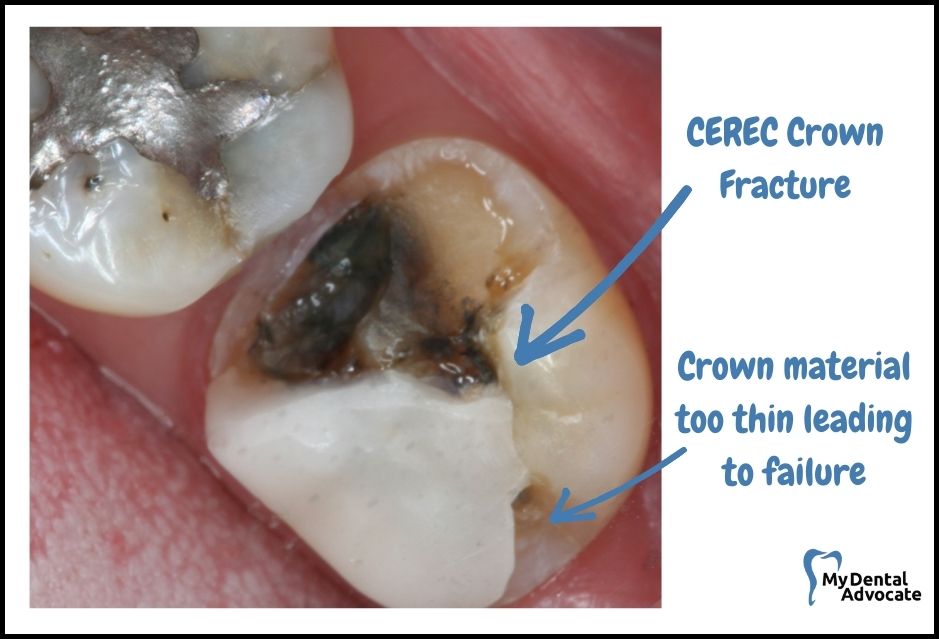
The most common failure of a CEREC crown is ceramic fracture due to sharp points under the crown or lack of adequate crown thickness.
After the heat treatment is complete and the crown cools off, the dentist will try it in the mouth.
Step 8: Evaluation Try-in
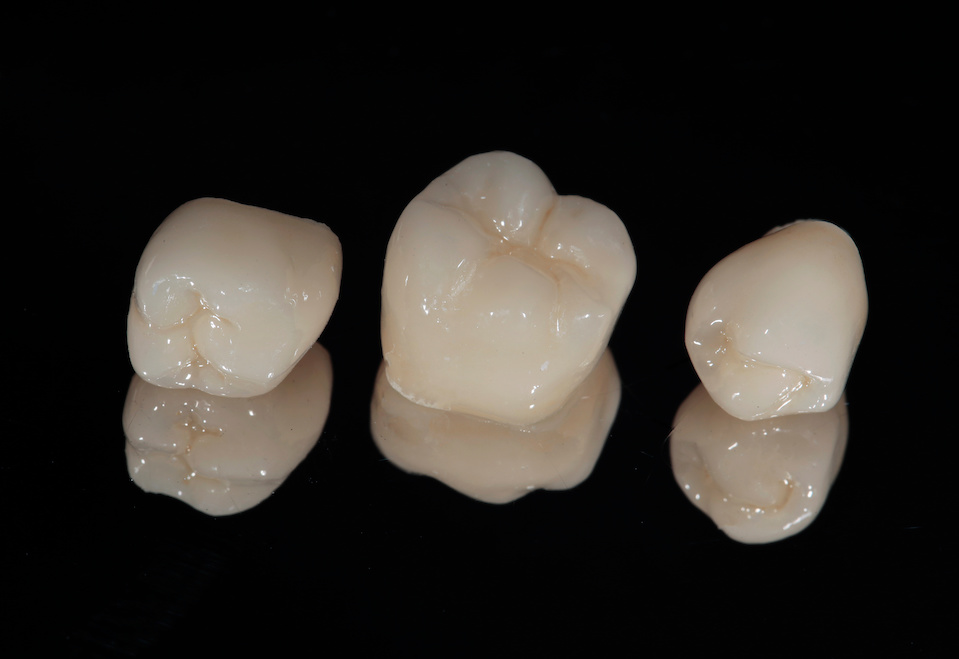
The CEREC crown try-in allows the dentist to evaluate the fit between the adjacent teeth and the contact with the opposing teeth.
In addition, the dentist will confirm the crown is free of ceramic fractures or other errors.
If an issue is discovered, the dentist has enough time to re-mill the crown in-office.
Also, the dentist will verify that the crown shade matches the adjacent teeth before the next step, crown cementation.
If a mistake is encountered with a traditional crown, a new impression is needed, and you must wait an additional 2-4 weeks for the crown to return from the dental lab.
Step 9: Cementation
Crown cementation may be the most critical step in the process because a poor technique could lead to crown failure. First, the dentist will clean the tooth and confirm that no debris is present that could interfere with the cementation process.
Traditional Cement for Crowns
How It Works: Traditional cement is simple. The dentist puts cement on the crown and places it on the tooth. No need for adhesives or bonding agents. It’s a tried and tested method.
Curing Time: The cement sets in 5-10 minutes, but it takes about 24 hours to fully cure. Some cements even absorb fluoride, helping to prevent cavities.
Bonding for Crowns
Stronger Attachment: Bonding means treating both the tooth and crown with special agents. This creates a strong chemical bond. It’s the best method for attaching crowns, but it requires precision.
Ideal Uses: Great for short teeth and veneers. It helps avoid color issues.
Curing Process: After placing the crown, the dentist might use a blue light to quickly cure the cement. This step is crucial for a strong bond.
Finally, the dentist will remove excess cement, and the crown will be polished using specialized burs. CEREC crowns are constructed using size-variable ceramic particles that can be rough to the tongue without proper polishing.
Step 10: Bite Verification
Bite verification involves checking the fit of the crown with the opposing tooth.
If the crown is too high, it will lead to soreness and sensitivity to cold and chewing. The dentist will have you bite down on special marking paper and move your jaw from side to side.
Imagine chewing on beef jerky so the dentist can visualize any interferences.
You may still be numb, so proper fitting may be compromised. Return to the dentist within 1-2 weeks after crown delivery if you discover any issues or have discomfort with your crown.
Common Questions
As you rush out the door and return to your life, you realize you forgot to ask your dentist a critical question. Below are the most common questions I hear from patients regarding CEREC crowns.
How long does it take to make a CEREC crown?
On average, most CEREC crowns can be completed within two hours. More experienced CEREC dentists can complete the crown within one hour.
However, expect two to three hours during your visit. In addition, if the crown requires heat treatment, more time is needed to heat and cool the crown.
Do CEREC crowns look natural?
CEREC crowns are highly esthetic and look like natural teeth because ceramic material has varying clarity levels, allowing the natural tooth shade to show through the crown.
The dentist can mask the natural tooth with less translucent ceramic if the natural tooth is dark. Also, a custom glaze can be applied to emphasize color differences and characterizations of the crown.
Can a root canal be done through a CEREC crown?
Although not desired, root canals can be completed through a CEREC crown without ruining the crown. More robust ceramic materials such as zirconia and lithium disilicate will be less likely to fracture.
A small filling can be placed in the crown after the root canal to seal the hole.
Why is my CEREC crown rough?
CEREC crown ceramic is fabricated using varying particle sizes. More significant particle ceramics require more polishing to minimize roughness and plaque build-up.
The more smooth the crown is, the less likely plaque build-up occurs. Suppose the crown is still rough after polishing and hasn’t been cemented. Glaze can be applied and heat-treated for a smooth finish.
How much tooth is needed for a crown?
It depends; less tooth structure is needed if the crown is bonded to the tooth. More tooth structure increases the crown success rate. The dentist may attempt to improve the overall tooth height by trimming down under the gums.
This allows the crown to fit below the gums and increases the wall height of the tooth structure to minimize the likelihood of it falling off.
Do CEREC crowns break?
CEREC crowns will break if they lack adequate ceramic thickness, especially on the posterior teeth (molars). Also, if there are sharp angles, points, or edges on the tooth, the CEREC crown can fracture under stress.
Therefore, the tooth must be smooth and round before crown placement.
Can a CEREC crown be repaired?
Unfortunately, if the crown breaks, it will need to be replaced. Unlike fillings, the dentist can’t quickly repair ceramic material.
Some dentists, including Smile Generation-supported dentists, have a 5-year guarantee for any CEREC crown completed in-office. Terms may be different between offices.
My Experience & Expertise
It’s been two hours, and you’re done with your crown, great job!
Are you relieved that you don’t have a stubborn temporary crown and must return for the final crown? The CEREC crown process is intimidating without proper understanding.
However, this simple guide will help you regain control, minimize unknowns and conquer dental anxiety.
Need a second opinion? We can help! Learn more. Knowledge is power when cultivating healthy dental habits. The more informed you are, the better positioned you’ll be to prevent avoidable and potentially costly dental procedures for you and your family. Watch for future blog posts, where we’ll continue sharing important information, product reviews and practical advice!
Sources
- Scott D. Psychological Aspects of Dental Anxiety in Adults 1982.
- Saatchi M. The prevalence of dental anxiety and fear in patients referred to Isfahan Dental School, Iran Dental Research Journal, 2015.
- Craig. CEREC AC with the CEREC Bluecam has a blue light-emitting diode (LED) and camera system, and uses active triangulation to create images of the tooth surface. Science Direct, 2012.

About the Author
Dr. Matthew Hannan, also known as “Dr. Advocate,” is a board-certified dentist on a mission to provide accurate dental patient education. He attended Baylor University before completing dental school at UT Health San Antonio School of Dentistry. He now lives in Arizona with his beautiful wife and 4 kids. Dr. Hannan believes everyone should access easy-to-read dental resources with relevant, up-to-date dental research and insight to improve their oral health.

Connect with Dr. Hannan!

Overcoming Dental Fears & Phobias
Many people experience anxiety at the thought of visiting the dentist. From the sound of the drill to the anticipation of pain, dental fears and phobias are common, yet they can prevent individuals from seeking necessary care. This article delves into the roots of dental anxieties, providing insight and practical strategies for overcoming them.

Best Toothpaste for Gingivitis (Top Picks)
We highlight each product’s unique, advertised benefits, identify their pros and cons and score each one from 1 to 5 based on four categories. The toothpaste with the highest score is crowned the overall champion; however…
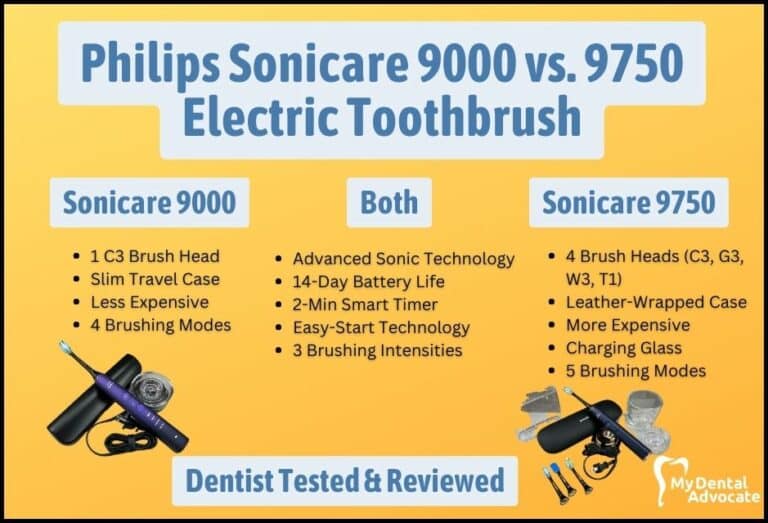
Philips Sonicare 9000 vs. 9750 Electric Toothbrush Review 2024
Choosing the right electric toothbrush can be a game-changer for your oral health. In this review, we’ll compare two popular options—the Philips Sonicare 9000 Electric Toothbrush and the Philips Sonicare 9750 Electric Toothbrush—to help you make an informed decision.
Gain Clarity with Our FREE Second Opinion Guide
Receive clear, expert second opinions online within 48 hours. Start today!
Product Reviews
Our 250+ dental product reviews (and counting), curated by an experienced dentist, are the most comprehensive online.
Toothbrush Genie
State-of-the-art chatbot designed to help you discover your perfect toothbrush in just a few simple steps!
Cavity Risk Assessment
Cutting-edge digital tool designed to evaluate your individual cavity risk based on your responses to a series of questions.
Gum Disease Assessment
Discover your gum disease risk with our quick and engaging 6-question assessment!


